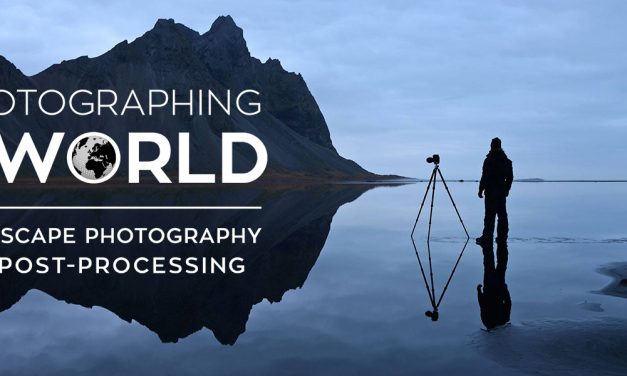
Enter the Reed Flute Cave, one of Guilin, China’s oldest and most popular attractions. The natural limestone formations are illuminated by an array of colorful lights that give it a wild and otherworldly feel. Throughout the interior, there are 70 ink inscriptions that can be dated as far back as 792 AD in the Tang Dynasty. That means people have been visiting this cave since ancient times. Although, I’m fairly confident the colored lights are a more modern addition.

It’s also worth noting that after spending 3 cold, overcast, and rainy weeks in southern China, I learned a very valuable photography tip. It never rains in a cave. ;)

Technical Mumbo Jumbo

Camera: Nikon D800
Lens: 14-24 f/2.8 (Shot at 16 mm)
Tripod: RRS TVC-24 / BH-40 Ballhead / RRS L-Plate
ISO: 100 at f/8
Pano: 5 Exposure Brackets x 4 Vertical Shots

Location: Shot in Guilin, China – February 2013, and post-processed in Key Largo, Florida – March 2013.

Hardware: 15” 2013 Macbook Pro Retina, Wacom Intuos5 Small Tablet

Software: Lightroom 4.3, Photoshop CS6, NIK Color Efex Pro 4, NIK Sharpener Pro 3

Technique and Details: Digital Blending / Photomerge

After spending some time learning the sequence of lights, I was able to time and shoot a 4 shot pano and a series of long exposure brackets. Each of the 4 (vertical) shots were blended manually in Photoshop before applying the Photomerge function to build the Pano. After that, some more editing was done and though the saturation levels were adjusted, no additional colors were added to the scene. The full resolution file is 10,000 x 6750 at 300dpi.

Espresso: 100% Arabica from the Yunnan Province of China.

Enter the Reed Flute Cave, one of Guilin China’s most interesting and ancient attractions

Lately, I’ve had some pretty bad luck with the weather. In the past 2 weeks for example, I’ve only seen the sun come out twice. It’s unfortunate but it’s all part of the game of full time travel and destination photography. Sometimes you win with epic skies, and sometimes you lose with solid grey overcast and rain. There’s really nothing to be done about it but accept it – or in my case, use it as an excuse to take shelter in my little hotel room and catch up on some much needed photo editing.

Since the constant grey sky has been so persistent, I wanted to edit a photo that would help lift my rain drenched spirits. So of course, the first Lightroom Catalogue I browsed was from Italy, specifically my summer visit to the beautiful Amalfi Coast. It instantly made me feel better when I remembered an entire trip of warm and perfect weather.

In my opinion, Positano is one of the most photogenic Italian cities and certainly one of the most beautiful along The Amalfi Coast. With it’s southern positioning, it can be equally beautiful at sunrise and at sunset, with each time of day providing unique and interesting lighting scenarios. On a clear night after the sunset, the blue hour can also be extraordinary. In that case, my recommendation would be to find a restaurant with a nice view and enjoy the scenery with a good bottle of local Italian wine… On second thought, make that two. :)

After the sun sets in Positano, one of the most beautiful towns along the Amalfi Coast.

Technical Mumbo Jumbo || Before and After

Camera: Nikon D800
Lens: 24-70 f/2.8 (Shot at 28 mm)
Tripod: RRS TVC-24 / BH-40 Ballhead / RRS L-Plate
ISO: 100 at f/8
7 Exposure Brackets

Location: Shot in Positano, Italy - August 2012, and post-processed in Yangshuo, China - February 2013.

Hardware: 15” 2011 Macbook Pro, Wacom Intuos5 Small Tablet

Software: Lightroom, Photoshop, NIK Color Efex Pro 4

Technique and Details: Manual Exposure Blending using Luminance Masking

To blend 5 of the 7 exposures together, I used a new Luminacne Masking Technique that I’m developing. Once I finish fine tuning the process, I’ll create the video tutorials.

Espresso: Lavazza Oro! Zoooooom!

At this point of the night in Bagan, there was no one else around. All the tourists and merchants had long since left for the night as the last of the ox carts lumbered slowly down the dirt road below. Save for the faint echo of distant sounds and the eerie shadows cast by the light of the full moon, I was the only one left, all alone and waiting patiently for the temples to illuminate for the night.

I spent the better part of a week exploring and photographing the ancient temple complexes of Bagan Myanmar by bicycle, both day and night, attempting to find the best spots and angles for photography. Between the 11th and 13th centuries, Bagan’s rulers managed to construct over 10,000 religious monuments in an area of 40 square miles. Today, after numerous recorded earthquakes, 2229 temples and pagodas still remain. That leaves countless opportunities for unique and interesting compositions, just waiting to be discovered. Even with a week of exploration, I feel like I barely scratched the surface. Then again, that just means I’ll have more to do when I revisit Myanmar this December. :)

Technical Mumbo Jumbo

Camera: Nikon D800
Lens: 28-300 f/3.5-5.6 (Shot at 180 mm)
Tripod: RRS TVC-33 / BH-55 Ballhead / RRS L-Plate
ISO: 100 at f/8
3 Manual Exposures

Location: Shot in Bagan, Myanmar - January 2013, and post-processed in Guilin, China - February 2013.

Hardware: 15” 2011 Macbook Pro, Wacom Intuos5 Small Tablet

Software: Lightroom, Photoshop, NIK Color Efex Pro 4

Technique and Details: Digital Blending with Luminance Masking

I shot 3 manual exposures in order to correctly capture the quickly fading light. With the bright moonlight, I was able to get a nice luminance variation throughout the different layers of atmospheric depth.

The blending was achieved using luminance masking techniques in Photoshop. After that, simple color corrections were applied using NIK Color Efex Pro 4 and Photoshop Adjustment Layers.

Espresso: Caffe Aurora – Medaglia D’oro. It was on sale so I bought 1 kilo. :)

Along the paved walk to the Nugget Point lighthouse in New Zealand (you can see it on the left), there are several good viewpoints, great for the conservative traveler. But if you look a little harder and steer away from the paved path, you can traverse the ridge and climb up the mountain, finding a higher and more astounding view near the top. I wouldn’t recommend bringing your grandmother up here or anything but in my opinion, the view makes it well worth the effort. So much so, that I climbed up here three times to wait for the right sky and the golden light – with a flashlight in tow for the dark climb down.

Upcoming Post-processing Workshops

In my upcoming workshops, I’ll be sharing my complete digital workflow from start to finish, focusing on manual blending techniques and how to maintain complete control over your images. From color correction to complex masking, if you’re curious how I carefully craft my photography, this is your chance to find out.

February 10th – Sydney, Australia
March 23rd – San Diego, California

Technical Mumbo Jumbo

Camera: Nikon D800
Lens: 24-70 f/2.8 (Shot at 30 mm)
Tripod: RRS TVC-33 / BH-55 Ballhead / RRS L-Plate
ISO: 100 at f/11
3 Exposure Brackets (-1, 0, +1)

Location: Shot in Nugget Point, New Zealand - December 2012, and post-processed in Bagan, Myanmar - January 2013 (with frequent power outages).

Hardware: 15” 2011 Macbook Pro, Wacom Intuos5 Small Tablet

Software: Lightroom, Photoshop, NIK Color Efex Pro 4

Technique and Details: Digital Blending and Luminance Masking

All 3 exposures were blended together using luminance masking techniques in Photoshop. After that, simple color, contrast, and texture adjustments were applied.

Espresso: Lavazza Rossa

I’ve always been fascinated by locations that so many people walk by every day without a second glance. Locations that I think scream with color, shape, and texture, just waiting to be appreciated and admired. As a photographer, I’m always challenging myself to see the world differently in order to recognize the true potential of a scene, and not miss out on these little subtleties that can often pass us by.

So while I was on the South Island of New Zealand, standing near the broken pier on St Clair Beach, I couldn’t help but admire the multitude of colors and shapes blending beautifully with the soft sunrise. While some people may simply see old broken posts, a photographer sees countless compositions and the possibility to capture something beautiful.

And yes, that island is actually positioned near the center of the posts. :)

Colors and shapes blend beautifully with the morning sunrise on St Clair Beach in New Zealand.


Technical Mumbo Jumbo

Camera: Nikon D800
Lens: 14-24 f/2.8 (Shot at 20 mm)
Tripod: A very sandy RRS TVC-33 / BH-55 Ballhead / RRS L-Plate
ISO: 100 at f/11
5 Exposure Brackets (-2, -1, 0, +1, +2)

Location: Shot in Dunedin, New Zealand – December 2012, and post-processed in Queenstown, New Zealand – January 2013.

Hardware: 15” 2011 Macbook Pro, Wacom Intuos5 Small Tablet

Software: Lightroom, Photoshop, NIK Color Efex Pro 4

Technique and Details: Digital Blending

All 5 exposures were blended together manually in Photoshop using a combination of hand painted masks and precise channel cutting with the lasso tool. No color was added to the scene. Simple color corrections were made using Curves to naturally enhance the color that was already present in the file. On another note, there were a few beer bottles and footprints to paint out as well.

Espresso: Cafe Aurora 100% Arabica

William Shakespeare once said that The Earth has music for those who listen. For me these elegant words perfectly embody the feeling I experienced while witnessing the Aurora Borealis. That night in Iceland, my heart sang along with the rhythm of motion, as I watched the curtains of light dance in the sky above. And as The Northern Lights sang their beautiful song, I could hear them with my ears, see them with my eyes, and feel them with my heart and soul.

Technical Mumbo Jumbo

Camera: Nikon D800
Lens: 14-24 f/2.8 (Shot at 14 mm)
Tripod: RRS TVC-33 / BH-55 Ballhead / RRS L-Plate
ISO: 800 at f/2.8
1 Exposure at 20 seconds.

Location: Shot in Western Iceland – September 2012, and post-processed near Dunedin, New Zealand – December 2012.

If you’re curious about how this image is created, you can see my post-processing breakdown on this Google+ hangout, hosted by Smugmug and NIK Software. In this video, Colby Brown and I each share our Lightroom, Photoshop, and NIK Software workflows as we edit a few of our favorite photographs.

To see the portion about this photo, go to: 37:50