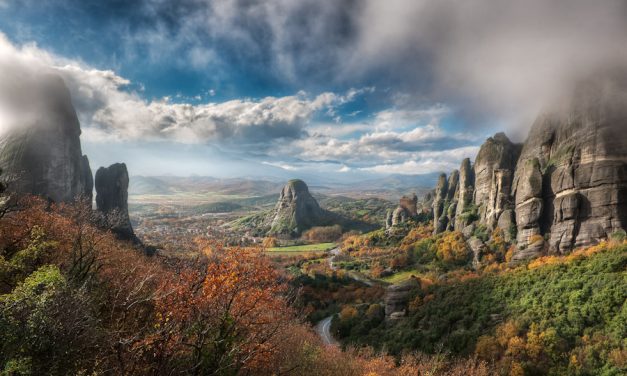
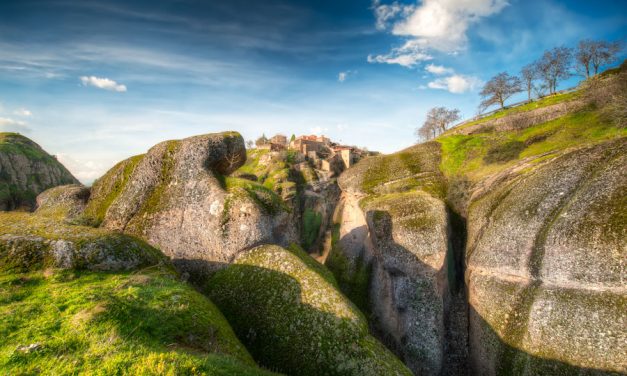
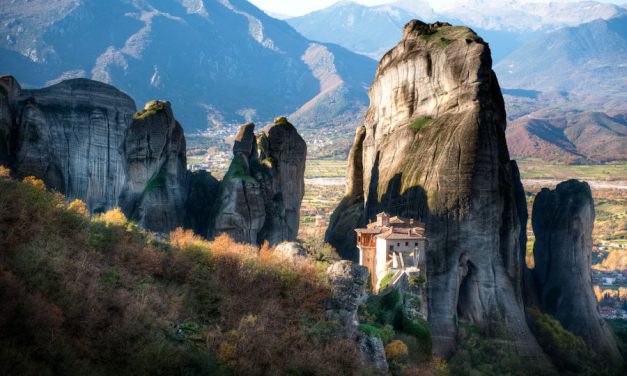
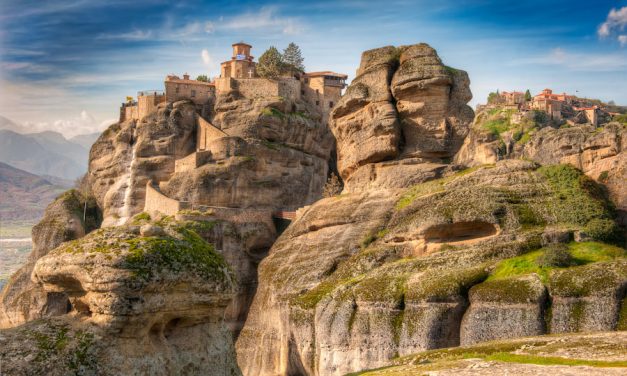
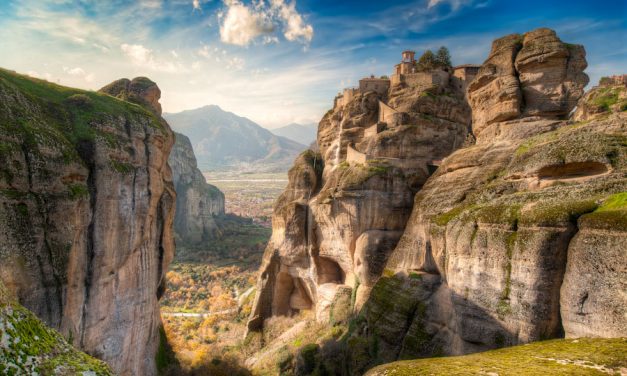
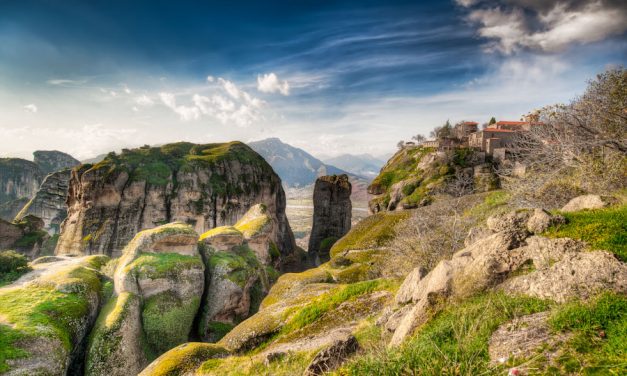
Sometimes everything happens for a reason. Sometimes events line up perfectly to deliver something truly magnificent; a once in a lifetime opportunity. Every once in a while, if we’re really lucky, we have our cameras ready.

Daily Banana – Twilight Monastery

Meteora - Twilight Monastery

an interesting turn of events.

The sprawling valley suddenly became illuminated in the late afternoon sun as the thick fog receded. Sun kissed the high peaks that glistened in the damp winter air as the thick rolling fog began pouring down the mountain side. — Wait, this is the end of the story. Lemme take it back a few steps…

This day, (day 2 of shooting) in Meteora, Greece, was going to be my big chance at scoring some sweet sunrise action. I got up early, stumbled out of bed, rolled back the curtains, and what do I see? Absolutely nothing actually. It was still full dark out.

I waited in a groggy stupor. I waited some more. I waited in an irritated stupor. I checked outside again and what did I see this time? I wasn’t sure. It sort of looked like clouds or overcast or cloudy overcast but also rain or mist, or rainy mist? What the crap?

I went outside in a groggy irritated stupor and as I looked at the mountains, The entire area was submerged in a thick rolling cloud fog thing, and this giant rainy fog monster was completely blocking the view to everything around.

I spent almost the entire day laying around in my hotel room, sulking and sobbing like a fat kid who lost his candy. Thanks mother nature. I don’t even have a TV in my hotel room.

After nearly an entire day of sulking, something amazing happened. The fog started to break. — In 10 seconds I was downstairs hailing a cab.

The driver quickly sped through Kalampaka and Kastraki and began the climb up to Meteora. This wasn’t because we were in a hurry. It’s because Greek cabbies drive like maniacs.

About half way up the winding road to Meteora, we rounded a switchback and saw an amazing weather event. The clouds were pouring between the spires almost like running water, falling miles into to distant valley below. It was a ridiculously cool sight but I decided to head to the top since it would reveal a much grander visual opportunity.

Within a few minutes of my decision to go to the top, we plunged face first into the brunt of the fog. — You could have cut the air with a knife. — The cab driver immediately slowed down to a crawl in order to navigate the dangerous mountain road. At this point I’m kicking myself for not stopping (literally). I decide that once we get to the top, I’ll attempt to explain to the driver to take us back down half way.

At the top, the driver pulls over, smiles and points to the meter total. I try to explain what I want to do. He looks confused. I try some more. Now he looks like I’m trying to do something like not pay him. He calls the cab company and hands me the phone saying “English.” I talk to the (The bad English speaking) cab company. He says, “ehmm. What you want.” I calmly explain. I explain some more. He doesn’t get it. I take a deep breath and try again, slower. He begins to understand. I explain that I don’t want him to wait for us after stopping. “Ah,” he says and now he gets it. I pass the phone back to the driver. He says “Ah,” too.

Now in complete understanding we head back down and emerge from the fog. “Stop Here,” I yell and promptly pay the tab. He smiles and says goodbye but I’m sure he’s happy to get rid of me.

What happens next can only be described as a gift from the universe. The giant fog monster was retreating down the mountain, leaving a path of wet winding mist, and what I can only describe as the most beautiful weather event that I’ve ever seen.

View some other HDR Before and After Photos of Meteora.

Daily Banana – The Valley Of Fog

HDR Photo - Meteora - Valley Fog

Monkey Tips – Shooting Handheld HDR

I like the freedom of shooting HDR Handheld. It gives me the ability to stick and move like a featherweight boxer, to float like a butterfly and sting like a bee. I can move around quickly and efficiently, finding dozens of unique compositions while the same process via tripod would only yield a few. Since I often shoot handheld, as in the case of today’s Image of Meteora, I even created a nifty Handheld HDR Tutorial that explains it in greater detail.

Keep in mind that there are some clear disadvantages to shooting Handheld HDR, like the fact that you have to align all the exposure brackets. This can cause serious issues with the quality of the final image if there is too much camera shake. Try and keep a few things in mind if you’re planning on shooting and processing handheld HDR.

With HDR Photography, nothing can really beat a good solid tripod. But hey, why on earth would we want to make it easy on ourselves? ;)

1. Shutter Speed.

Camera shake causes motion blur so always make sure that you’re using a suitable shutter speed. Keep in mind that most cameras, when set to Auto Exposure Bracketing in Aperture Priority Mode, will show the shutter speed for the bottom (negative) exposure first. If your camera shows the Median Exposure first, adjust your camera settings to show them in order from negative to positive. This will make the shutter speed calculation much easier.

So, let’s say that you have your camera set to Auto bracket 3 Exposures at (-2,0,+2). That means that your camera should be showing the shutter speed for the -2 bracket first. Let’s say it reads 1000. 1000 is a very acceptable shutter speed for handheld photography but we need to think about this a little more.

Disclaimer: There is a little bit of math involved. Sorry. ;p

Every time your camera moves to the next bracket of 1 (also referred to as: A Stop), the shutter speed will half itself. When you set your camera to auto bracket (-2, 0, +2), it means that each step is actually 2 stops _(like a bad country western line dance)._

Anyway, it’s really simple and here’s how it works. If (-2) = 1000, (-1) = 500, (0) = 250, (+1) = 125, (+2) = 60. So, the shutter speeds for (-2, 0, +2) will be 1000, 250, and 60. — You can see how quickly a shutter speed of 1000 becomes a measly 60.

If lighting allows, try to adjust the aperture of your camera until the first bracket reads somewhere between 2,000 – 3,000. A (-2) of 3,000 will give you a (+2) of about 180, which is much better for handheld photography. Shooting this way can minimize the chance of blurry exposure brackets.

2. Steady Hand

No matter how fast your shutter speeds are, you’re going to have to hold the damn camera as steady as possible (duh). It’s not just because of motion blur. It’s also because too much variation in movement from bracket to bracket may complicate the alignment process. Photoshop does a hell of a job aligning images but even (the all powerful) photoshop can only fix so much.

A very common problem can be too many shifts in perspective and/or parallax. Parallax occurs when objects at different distances move at different speeds. So if your camera is shaking and flopping around all over the place, the foreground elements will move and rotate quickly, while the background elements will only move slightly. Any rotation in the camera will amplify this effect and cause too many perspective shifts between frames. So camera shift = bad. Camera shift + rotation = really bad.

Something that helps me tremendously is turning on _(and using)_ my camera’s built in grid. Some camera grids are fancier than others but even the simple ones can help you anchor elements into frame. You can also use the little focus squares in the viewfinder to lock onto small details. I personally like to establish a horizon line with the grid, then use one of the focus squares to lock onto a specific point of reference.

Once you’ve locked on and you’re confident you can keep the camera steady, make sure that you have good square footing and take a deep breath. Some people like to shoot as the exhale, some like to shoot while holding their breath. Find out what works best for you.

Occasionally you can use things to brace yourself against or to lean the camera on. Try and be clever to find some of these helpers.

3. How many exposure brackets

Often, the 3 shot bracketing of (-2,0,+2) is enough for all situations. You would only (possibly) need additional brackets (of 7 or 9) if you were shooting into direct light, such as a sunrise or sunset. The bottom line is, if you don’t need them and you don’t have a tripod, don’t shoot them. The fewer layers there are to re-align, the better chance that they will align properly. It’s hard enough holding the camera still for 3 or 5 shots. Try and avoid 7 or 9.

4. Be realistic

If it’s full on darkness out there you’re probably not going to be able to pull off a 5 second handheld exposure. Sorry, that’s not being pessimistic, it’s being realistic. Unless you can magically turn yourself to stone at will, it may be time to dust off the old tripod. If tripods are not allowed, make sure you’ve turned the f-stop all the way down to the lowest setting.

Having fast glass can really help in these situations. Try using lenses with an aperture rating of 1.4 – 2.8. This will help to boost shutter speeds. You can even turn up the ISO a little bit if necessary but try to only do so as a last resort. Increases in ISO will cause more noise and grain.

5. Be mindful of the elements

The best example of uncooperative elements is the wind. Wind is a (absolute) Handheld HDR killer. If the wind is cranking, try kneeling down, resting your weight on the back of your legs by sitting back on your heels. Try to brace your elbows on your chest and hold the camera with both hands. This centers your mass and gives you more stabilization against the wind.

Also, try to square your footing as often as possible. On alpine hikes, this might be tricky as the terrain can be unforgiving. Do your best to get in a stable position before shooting. Some alpine conditions also make it nearly impossible to effectively set up a tripod, so these Handheld techniques are sure to come in handy.

6. Always shoot a backup

I always shoot the same scene twice if it’s hand held. This practice has saved my ass many times. Since alignment issues happen quite often, It’s good to have a backup version ready to go if things aren’t working out in post. Sometimes I even test both versions and see which one aligns better before I go ahead with HDR Processing.

If at this point you’re thinking, “yea, yea, get on with it already,” then move on to the Handheld HDR Tutorial.

Daily Banana – Meteora – Landscape Dreams

Technical Mumbo Jumbo:

- Nikon D3 – Nikkor 14-24 f/2.8@ 14mm f/5.6 Iso: 100
- 5 (Handheld) Exposure Brackets (-2,-1,0,1,2)
- HDR Photography Processing & Tone Mapping using Photomatix Pro
- Post Processing & Color Correction in Photoshop
- Enhanced detail with Nik Software Sharpener Pro
- Handheld FTW!

(move the slider to compare before and after)
HDR Photo - Meteora, Greece - Landscape Dreams

do the penguin

Have you ever huddled close to someone for warmth like an Emperor Penguin?

This shot was taken on the morning of my third day in Meteora. We had gotten up well before dawn, packed gear and food for the day, and caught a cab to the top most Monastery. The weather had been consistently chilly, hovering around 5 degrees Centigrade so I didn’t bother confirming the forecast. Instead, we (very stupidly) prepared for 5-10 degree day.

Oops.

As the tail lights of the taxi disappeared from view as it descended the long winding mountain switchbacks, we immediately had an ‘Oh Crap’ moment. It was way WAY colder than we had prepared for. — Later, I would find out that the weather had dropped to -5 degrees with a strong -10ish wind chill.

So, there we were, 10 kilometers away from civilization, 2000 ft up on a towering spire, alone, with no cellphone reception, freezing our asses off.

And what did we do about it?

We said, screw shooting the sunrise, found shelter, and huddled together like penguins, shivering like mad, waiting the (seemingly infinite) few hours until the sun awarded us with it warming light.

Once the sun had risen enough to warm the day, we collected our senses, cleaned out the frozen boogers from our noses, and began the 15 kilometer trek back to our hotel, stopping to marvel (and of course take lots of pictures) of the beautiful Greek mountains.

Check out more HDR Photos of Meteora.

Technical Mumbo Jumbo:

- Nikon D3 – Nikkor 24-70 f/2.8@ 70mm f/2.8 Iso: 100
- HDR Photography Processing & Tone Mapping using Photomatix Pro
- Post Processing & Color Correction in Photoshop
- Blended in a bit of the original (non HDR) medium exposure.
- Sharpened Edges with Topaz InFocus
- Enhanced detail with Nik Software Sharpener Pro
- Did the penguin dance

Daily Banana – Meteora – Morning Highlights

(move the slider to compare before and after)
HDR Photo - Meteora, Greece - Morning (sunrise) Highlights

Happy Meteora Monday!

What the heck is Meteora Monday? Honestly, I haven’t got a clue. It just sounds good, sort of rolls off the tongue, don’t you think?

Well, it turns out that I’ve unintentionally posted a shot from Meteora for the past 3 Mondays. I didn’t plan on it. It just sort of happened.

Maybe Sundays create some sort of strange temporal vortex, drawing my memories back to those towering spires, compelling me to relive my experience by working in Photoshop & preparing Monday’s post.

Yea, you’re probably right, it’s just a coincidence. Either way, though, It’s a pretty good way to start the week. ;)

This weeks shot of Meteora brings you closer to The Monasteries. Perhaps you’ve noticed that each photo so far draws you closer? That part was intentional. The Monday thing, not so much.

If you’ve missed the other two (Monday Meteora) posts, check out the Meteora Category on the sidebar.

Technical Mumbo Jumbo:

- Nikon D3 – Nikkor 24-70 f/2.8@ 38mm f/6.3 Iso: 250
- 7 (handheld) Exposure Brackets (-4,-3,-2,-1,0,1,2)
- HDR Photography Processing & Tone Mapping using Photomatix Pro
- Post Processing & Color Correction in Photoshop
- Enhanced detail with Nik Software Sharpener Pro
- Got Temporal Vortex?

Daily Banana – Meteora – Twin Monasteries

(move the slider to compare before and after)
HDR

exploration (and coffee) is the key

Every time I work on these photos from Meteora, I feel an incredible sense of serenity. Every time I look at images of this beautiful place, I fell a strong sense of inner tranquility; the type of calming sensation that reminds me that it’s been at least 2 hours since my last cup of coffee…

Mmmm, coffee… The thought of having some of that tasty beverage brings me to today’s monkey business, exploration.

Now, a lot of people ask me, (at least my Mom does) how do I find some of these shots. Well, my reply is a simple one: I explore, a lot, mostly on foot, sometimes many miles a day. Sometimes too many miles a day…

Not only is setting out on foot the cheapest way to explore, It’s also the most effective. When you walk, you have time to notice all the tiny little details. Here in Meteora, like many other places, the tiny details can guide your senses, giving you the ability to be more in tune with your surroundings. The sounds, the smells, the feelings, these all play an important role in photography, adding to the emotional impact of the shot. Think about it. If it’s emotion that you are trying to portray, shouldn’t you feel it yourself? Sometimes you have to totally immerse yourself in the environment to truly understand and appreciate it, and doing so is much more difficult from behind a wind shied.

So, get some decent hiking shoes, pack a good lunch with a thermos full of espresso, and start exploring. You’ll be happy that you did. ;)

Technical Mumbo Jumbo:

- Nikon D3 – Nikkor 14-24 f/2.8 @ 21mm f/6.3 Iso: 100 / 7 (handheld) Exposure Brackets (-3,-2,-1,0,1,2,3).
- HDR Photography Processing & Tone Mapping using Photomatix Pro
- Post Processing & Color Correction using Photoshop
- Enhanced detail with Nik Software Sharpener Pro
- Used spellcheck 8 tymes

Daily Banana – Meteora – High Up Above

(move the slider to compare before and after)
HDR